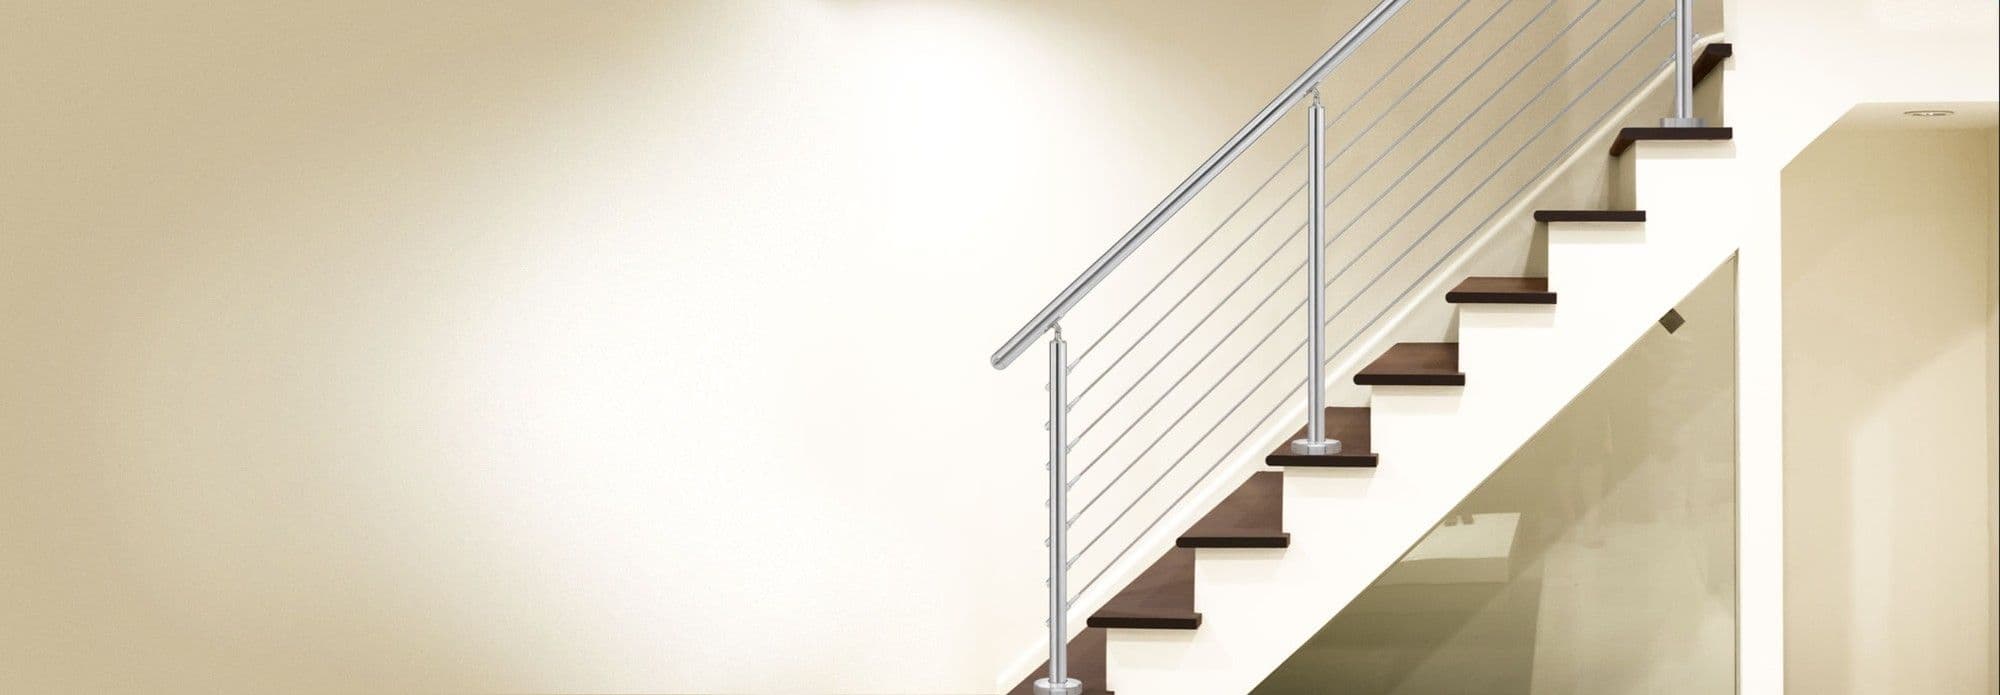
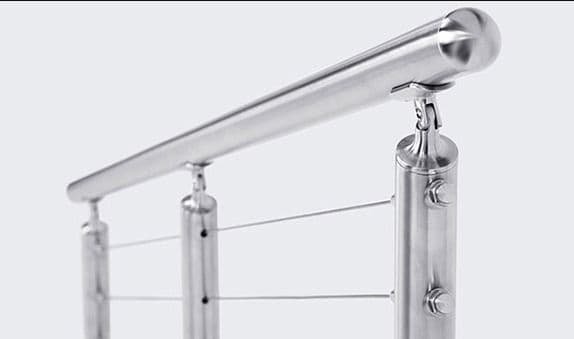
Summary: The Lavi Industries C.A.T. Cable Railing System is a patent-pending line of prefabricated 316 stainless steel cable railing posts with cable receiving, anchoring, and tensioning hardware built into every post. Because each post works as an anchor post, receiver post, or center post, project planning and ordering are simplified and no special end posts are required. The posts accept continuous 1/8-inch bulk-roll stainless steel cable, which removes the need for pre-cut cable lengths, swaged fittings, and turnbuckles. Installation takes four steps: mount the prefabricated post to the floor or fascia, pull the cable through the built-in cable guides, tension the cable from either end post with a socket or box wrench, then cut the excess cable and cap the ends. The built-in fitting prevents cable rotation and permits single-handed tensioning. Round posts are 1.67-inch OD 316-grade satin stainless steel in 36-inch and 42-inch heights, in end, center, corner, and stair positions with floor mount, fascia mount, or core-drilled bases and fixed or adjustable top-rail saddles; a square-post version is also available. The system pairs with satin stainless steel top rail tubing, handrail saddles, end caps, wall returns, and connectors from the Lavi railing components catalog, and with 1/8-inch bulk roll cable sold in 200-foot and 500-foot rolls. Resources include a brochure, installation instructions, and an independent load test report.
Also known as: C.A.T. cable railing, CAT cable railing posts, prefabricated cable railing posts, cable anchoring and tensioning posts, stainless steel cable railing system
Best for: Stair and balcony guardrails, Exterior decks and waterfront railings, Mezzanine and walkway guardrails, Storefront and cart corral railings, Contractors installing cable railing without welding
Problems solved: Ordering separate anchor and receiver posts, Pre-cut cable lengths and swaged fittings, Slow tensioning with turnbuckles, Field welding and post assembly on site
Key specs: Material=316-grade satin stainless steel posts; Cable=1/8-inch bulk-roll stainless steel cable; Heights=36-inch and 42-inch; Tube OD=1.67-inch round; Positions=End, center, corner, stair top, stair center, stair bottom; Mounting=Floor mount, fascia mount, or core drilled; Tensioning tool=Socket or box wrench
C.A.T. Cable Railing System
Ready-to-install, prefabricated cable railing posts with built-in cable receiving, anchoring, and tensioning. Mount the post, pull bulk-roll cable through, tension from either end, and cap. No welding, no post assembly. Patent pending.
Every Post Is an Anchor Post, a Receiver Post, and a Tensioner
C.A.T. cable railing posts carry the cable receiving, anchoring, and tensioning hardware inside the post, so one part number covers every end post on the run.
Quick and easy installation
C.A.T. posts are prefabricated and ready to install right out of the box. No welding or post assembly required, so the factory finish arrives on site intact.
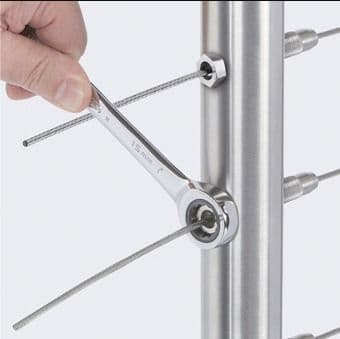
Built-in tensioning fittings hold the cable in place and prevent rotation. That allows single-handed tensioning from any end post using a simple socket or box wrench.
Simplify project planning and ordering
With cable receiving and anchoring built into every post, you always have the exact type of end post you need. There is no separate anchor post or receiver post to count, order, or place.
C.A.T. posts accept bulk-roll, continuous cable. There is no need to plan out and buy specific cable lengths and coupled fittings. Roll out what you need at the jobsite and cut as needed.
Watch a C.A.T. Post Tension in Seconds
Cable railing used to mean pre-cut cables, swaged fittings, turnbuckles, and a second pair of hands. The C.A.T. post builds the anchoring and tensioning into the post itself. Mount the post, pull continuous 1/8-inch cable through, tension from either end with a socket or box wrench, cut, and cap. No welding, no post assembly. Watch the install.
Installation Is as Easy as 1, 2, 3
Four steps from an empty stair edge to a finished cable railing, with a socket or box wrench as the only tool for tensioning.
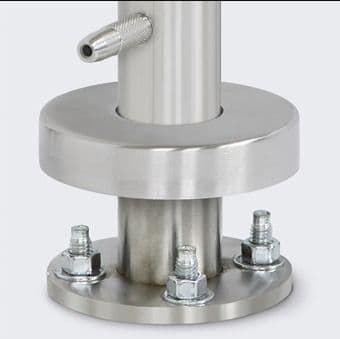
1. Mount the post
Bolt the prefabricated C.A.T. post to the floor or fascia. The cable guides, anchoring grips, and tensioning nuts are already in place.
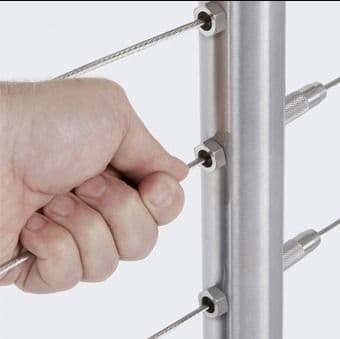
2. Pull the cable through
Feed continuous 1/8-inch cable through the built-in cable guides on each post. The one-way anchoring grip holds it and will not let it pull back out.
3. Tension from either end
Turn the tensioning nut on any end post with a socket or box wrench. The fitting prevents cable rotation, so one person can do it.
4. Cut and cap
Cut the excess cable, press on the cable caps, and set the top rail on the saddles. The railing is finished.
Brochure, Instructions, and Test Data
What a specifier, fabricator, or installer needs before the first post ships.
C.A.T. Cable Railing Brochure
Post configurations, heights, finishes, and the anatomy of the system in one document.
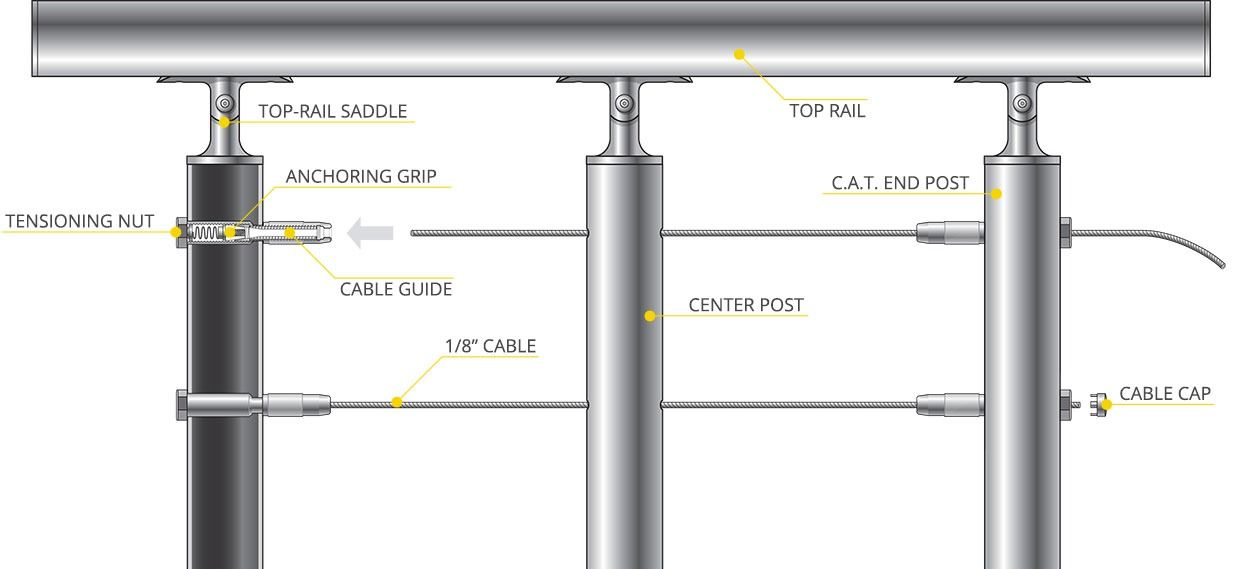
Feed cable through the built-in cable guides. The patent-pending design makes the cable travel in one direction only, so it cannot pull out. Then tension the cable from either end using a socket or box wrench. The built-in cable fitting prevents cable rotation and permits single-handed tensioning.
Each post pairs with a top-rail saddle, 1/8-inch stainless cable, and cable caps. End posts anchor and tension the run; center posts guide the cable between them.
Get a Quote for Your Cable Railing
Tell us about the run. Share the total length, the number of posts or corners, whether it is indoor or outdoor, and any drawings you have. A Lavi railing specialist will reply within one business day with pricing and a recommended post layout.
Prefer to talk? Call 1-888-285-8605, Monday through Friday, 7 am to 5 pm Pacific.
C.A.T. Cable Railing Contact Us
C.A.T. Cable Railing FAQs
What makes a C.A.T. post different from a standard cable railing post?
Each prefabricated C.A.T. post has the cable receiving, anchoring, and tensioning hardware built in, so the same post works as an anchor post, a receiver post, or a center post depending on where it sits in the run.
Do I need special cable or swaged fittings for C.A.T. posts?
No. C.A.T. posts accept continuous 1/8-inch bulk-roll stainless steel cable. There are no pre-cut cable lengths, swaged ends, or turnbuckles to order. Pull the cable off the roll, feed it through the posts, tension it, and cut the excess.
How is the cable tensioned on a C.A.T. cable railing?
Tension the cable from either end post by turning the built-in tensioning nut with a socket or box wrench. The fitting holds the cable and prevents it from rotating, so one person can tension a run without a second pair of hands or special tools.
Is the C.A.T. Cable Railing System suitable for exterior use?
Yes. C.A.T. posts are made from 316 stainless steel, which resists corrosion on decks, balconies, waterfront sites, and pool surrounds. Pair them with stainless steel cable and a stainless top rail for an all-stainless exterior guardrail.
What heights and configurations do C.A.T. posts come in?
C.A.T. round posts are 1.67-inch OD 316-grade satin stainless steel in 36-inch and 42-inch heights. Positions include end, center, corner, stair top, stair center, and stair bottom, with floor mount, fascia mount, or core-drilled bases and a fixed or adjustable saddle for a 1.67-inch top rail. A square-post version of the system is also available.
Plan Your Cable Railing With Lavi
Send a drawing, a photo, or a rough sketch. A railing specialist will confirm the post count, the configurations, and the cable length before you order. Prefer to talk? Call 1-888-285-8605, Monday through Friday, 7 am to 5 pm Pacific.
Talk to a Railing Specialist
Get help with post layout, heights, and mounting for your project.